We spent some time in another post talking about how cool it is that Adobe® Photoshop® CS5 allows you to create Flash Panels to launch from inside of the application. These panels can be made with Configurator 2, available at the Adobe website. In an earlier post we made a panel that allowed us to use specific tools for a retouching workflow. One of the best changes that they have made with this is the inclusion of WebKit – allowing you to embed HTML pages with ease inside of the panels. Let’s go ahead and do something fun now, creating a mobile Twitter client that will run inside of Photoshop CS5.
Go to the labs.adobe.com website and download the latest release of Configurator 2 if you haven’t already done so. This will allow you to make the panels that will run inside of Photoshop CS5 and InDesign CS5. (Note: You will need to have Adobe AIR installed.)
Once you’ve installed Adobe Configurator, launch it from the your Applications (on PC: Start>Programs).
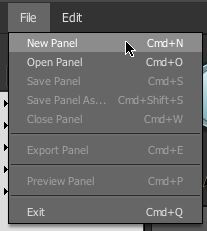
Create a new panel by clicking on File>New Panel.
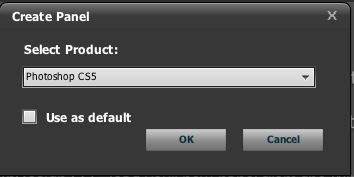
Make sure you select Photoshop CS5 as the application that you’re creating the panel for.
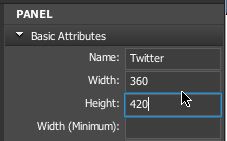
Once you are in the main panel window, enter in “Twitter” in the Panel>Name field, as well as a size for how big you would like this panel to be when you expand it in Photoshop CS5.
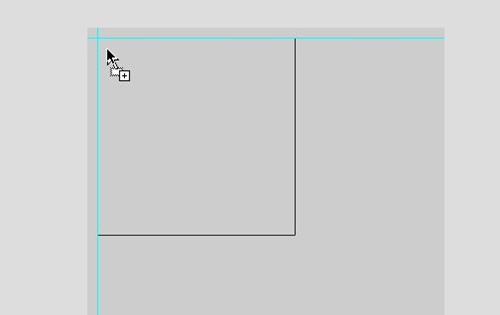
Along the left panel, expand the Widgets section, and you’ll see that there is an HTML widget available to you there.
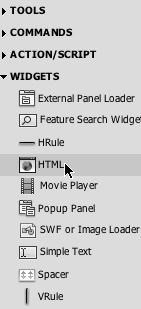
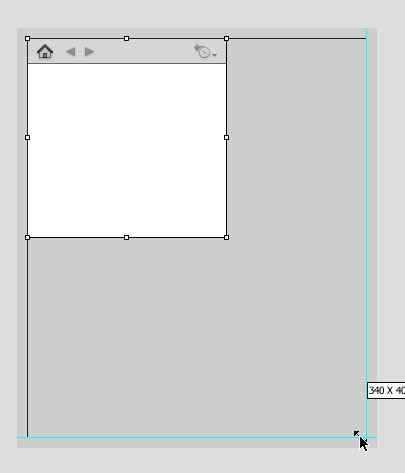
Drag the HTML widget to the panel area, using the built in guides to resize the panel as necessary.
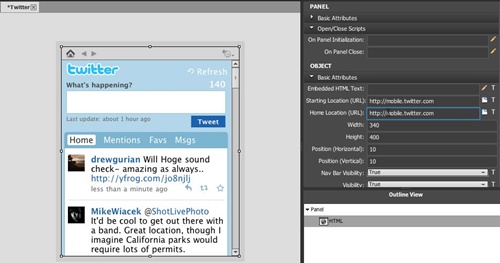
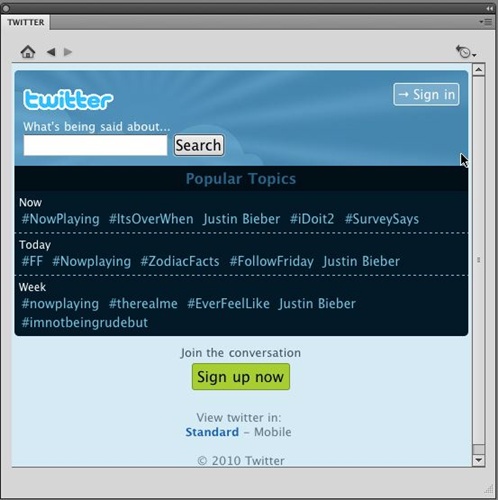
Select the HTML widget on your panel, and in the Object Properties on the right hand side fill in the Starting Location URL and Home Location URL as http://mobile.twitter.com. This will use Twitter’s mobile page that’s reserved for cell phones, and therefore is better for smaller screen sizes.
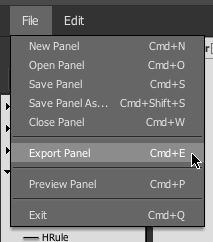
Once that’s complete, click on File>Export Panel to take what you have done and export it for use in Photoshop CS5. Navigate to your desktop and save it there.
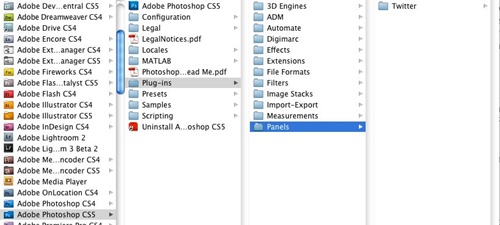
Once you have the folder on your desktop, move it into the Photoshop CS5>Plugins>Panels folder.
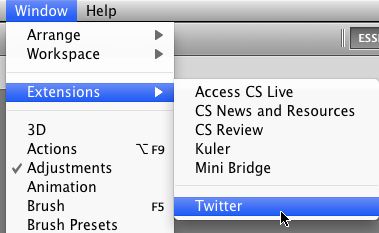
Once the panel is in place, it will require you to restart Photoshop CS5. After you restart, you will be able to access the panel by going into Window>Extensions. This is where any panels that extend Photoshop CS5 are held. In Photoshop CS4, this panel would need to initialize and close, prompting you to reopen the panel a second time. I’m happy to say that this is not the case anymore.
The great part about having webkit inside of Photoshop CS5 is that this will also save your browser state. Once you log into Twitter here, you won't have to do it again. Now you have the ability to monitor all of your social media communications without having to leave your application.
See if you can find other creative ways to manage your web experiences in Photoshop. For example, create an app that goes to m.gmail.com. Once you get there you may have to double click on the fields to enter in information, but hey... you don’t have to leave Photoshop to do so!
Go to the labs.adobe.com website and download the latest release of Configurator 2 if you haven’t already done so. This will allow you to make the panels that will run inside of Photoshop CS5 and InDesign CS5. (Note: You will need to have Adobe AIR installed.)
Once you’ve installed Adobe Configurator, launch it from the your Applications (on PC: Start>Programs).
Create a new panel by clicking on File>New Panel.
Make sure you select Photoshop CS5 as the application that you’re creating the panel for.
Once you are in the main panel window, enter in “Twitter” in the Panel>Name field, as well as a size for how big you would like this panel to be when you expand it in Photoshop CS5.
Along the left panel, expand the Widgets section, and you’ll see that there is an HTML widget available to you there.
Drag the HTML widget to the panel area, using the built in guides to resize the panel as necessary.
Select the HTML widget on your panel, and in the Object Properties on the right hand side fill in the Starting Location URL and Home Location URL as http://mobile.twitter.com. This will use Twitter’s mobile page that’s reserved for cell phones, and therefore is better for smaller screen sizes.
Once that’s complete, click on File>Export Panel to take what you have done and export it for use in Photoshop CS5. Navigate to your desktop and save it there.
Once you have the folder on your desktop, move it into the Photoshop CS5>Plugins>Panels folder.
Once the panel is in place, it will require you to restart Photoshop CS5. After you restart, you will be able to access the panel by going into Window>Extensions. This is where any panels that extend Photoshop CS5 are held. In Photoshop CS4, this panel would need to initialize and close, prompting you to reopen the panel a second time. I’m happy to say that this is not the case anymore.
The great part about having webkit inside of Photoshop CS5 is that this will also save your browser state. Once you log into Twitter here, you won't have to do it again. Now you have the ability to monitor all of your social media communications without having to leave your application.
See if you can find other creative ways to manage your web experiences in Photoshop. For example, create an app that goes to m.gmail.com. Once you get there you may have to double click on the fields to enter in information, but hey... you don’t have to leave Photoshop to do so!
No comments:
Post a Comment